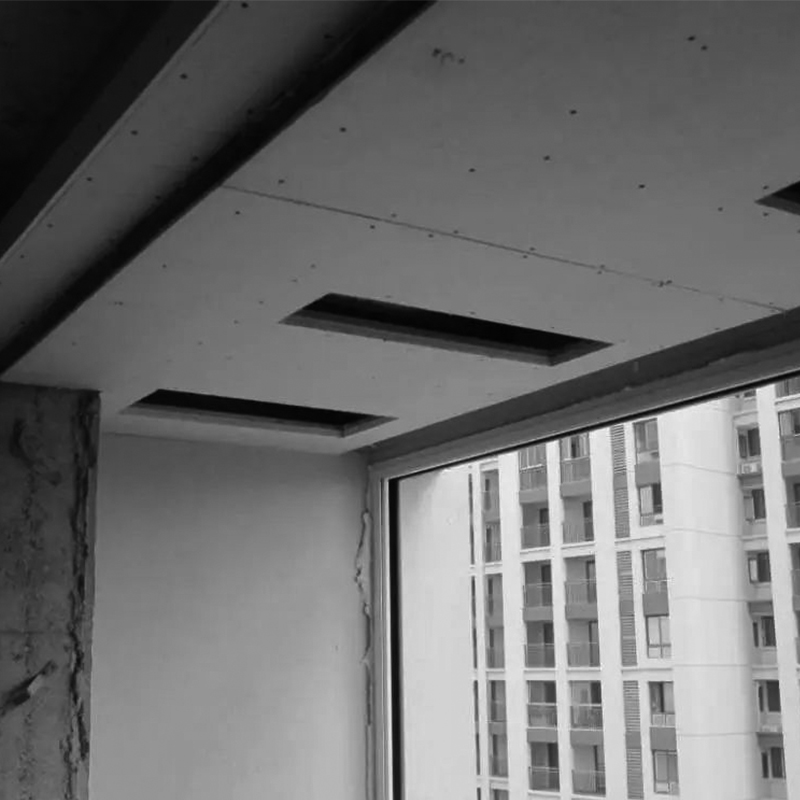
The ceiling not only improves the aesthetics of the plane overhead space, but also plays important roles in heat insulation, heat protection, and sound insulation. It also serves as a hidden layer for ventilation, air conditioning, communication, and fire protection, and occupies an extremely important position in interior decoration.
1. Ceiling installation tools
The tools needed for ceiling installation may vary depending on the type of ceiling being installed, but there are a few basic tools that are universally needed.
- Power tools: air pump, electric hammer, electric drill, nail gun, etc.
- Hand tools: wire, screwdriver, tape measure, chalk line, level, saw, wood planer, pliers, wrench, etc.
2. Ceiling Installation Materials
The materials used for suspended ceilings include light steel keels, wooden keels, gypsum boards, plywood, PVC boards, mineral wool boards, aluminum panels, integrated suspended ceilings, etc.
3. Ceiling construction technology
The specific construction process of the ceiling is affected by the choice of materials, because different materials require different techniques during installation.
1. Preparation: Before starting the ceiling installation, you need to process the base layer, check the design drawings, compare the structural dimensions, ensure that the pipeline design is complete, and prepare the tools and materials required for the ceiling installation.
2. Mark and measure: Measure the height of the keel and the standard height of the ceiling design, then mark the ceiling height and the horizontal line for the keel positioning.
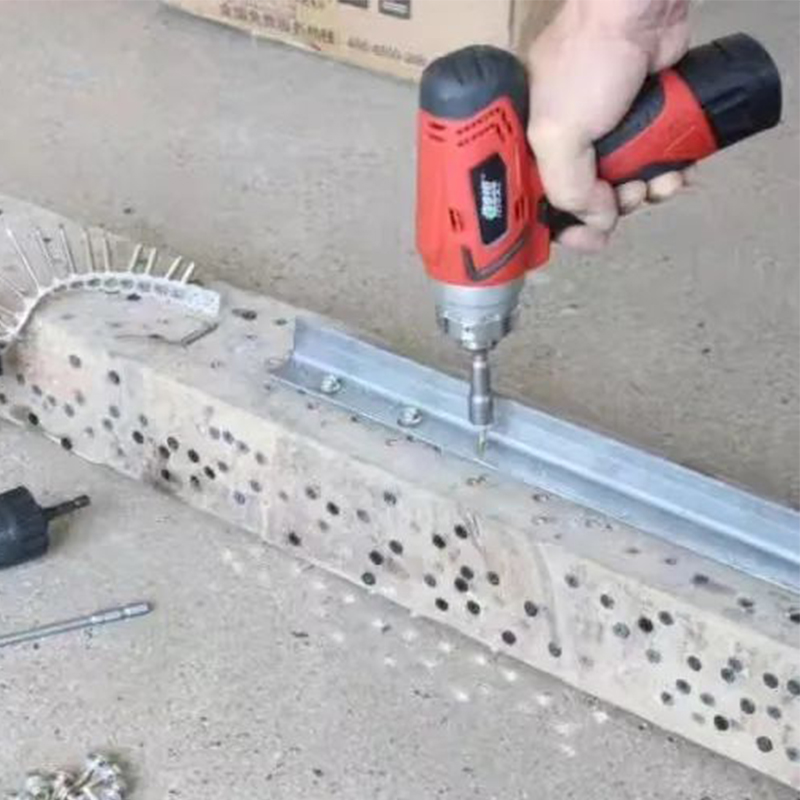
3. Fix the hanging parts: According to the position of the main keel and the hanging spacing, fix the angle steel blocks along the marked lines with expansion screws or nails, and tie the wire to the hanging parts.
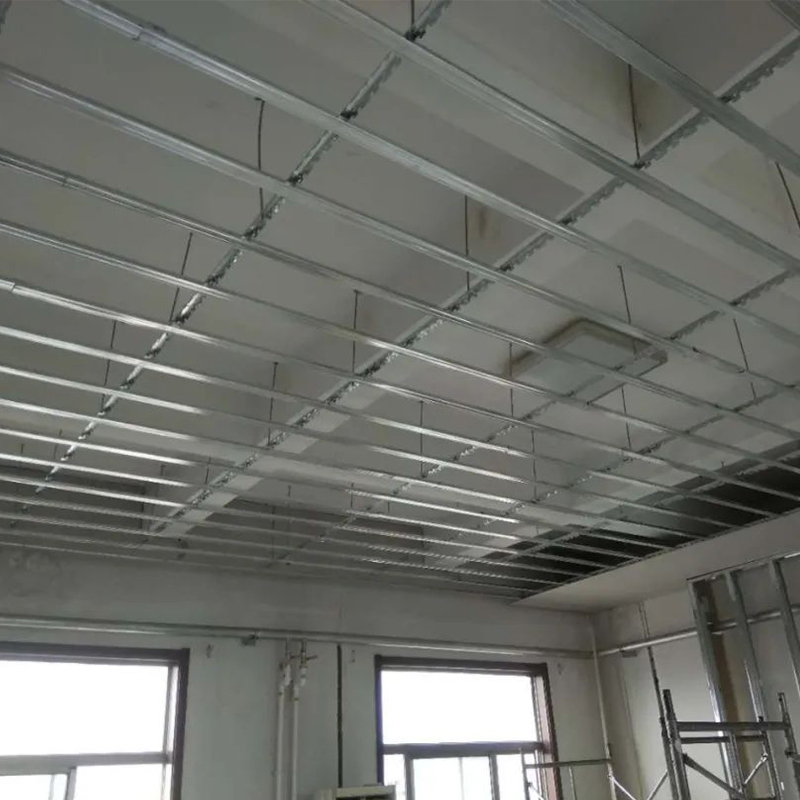
4. Install the main keel: After preparing the hanger nut, first install the hanger on the main keel, then align the assembled hanger with the corresponding bolts on the hanger, tighten the nut, connect the main keel with the connector, adjust the height and level with the line, install the opening and main keel, and make necessary adjustments and connections.
5. Install the secondary purlin: Install the secondary purlin according to the position of the wind deflector and the main purlin, and fix it with nails or expansion screws.
6. Finishing work: After the construction is completed, it is necessary to deal with details, conduct quality inspections and acceptance of hidden works. Finally, ensure the protection of the finished product.
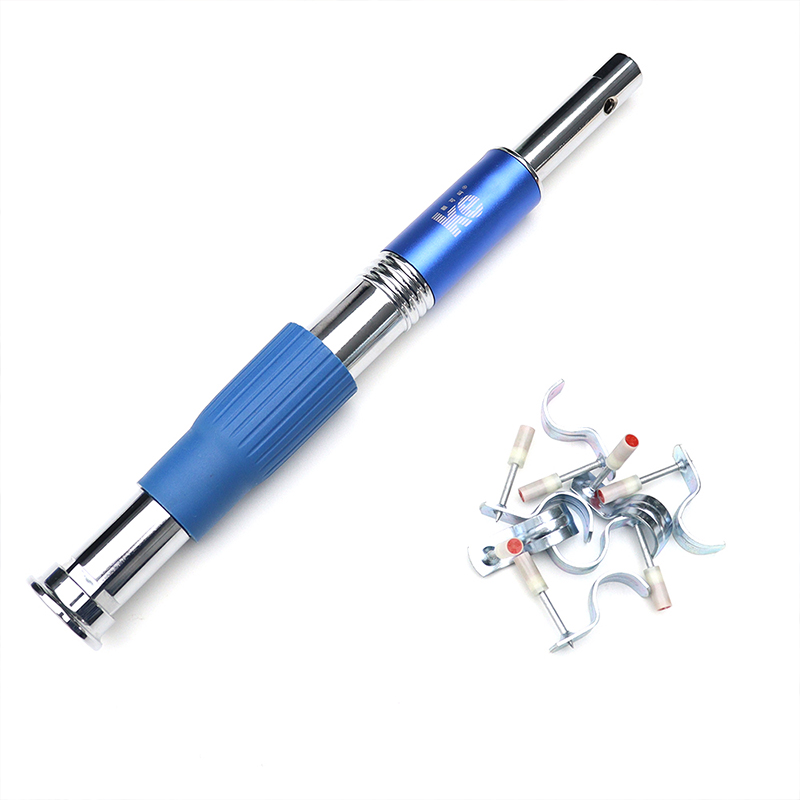
The introduction of ceiling nail guns and integrated nails has greatly reduced the time required for ceiling installation. These convenient and efficient new tools have been well received by many construction companies and ceiling contractors.
Post time: Mar-21-2025